
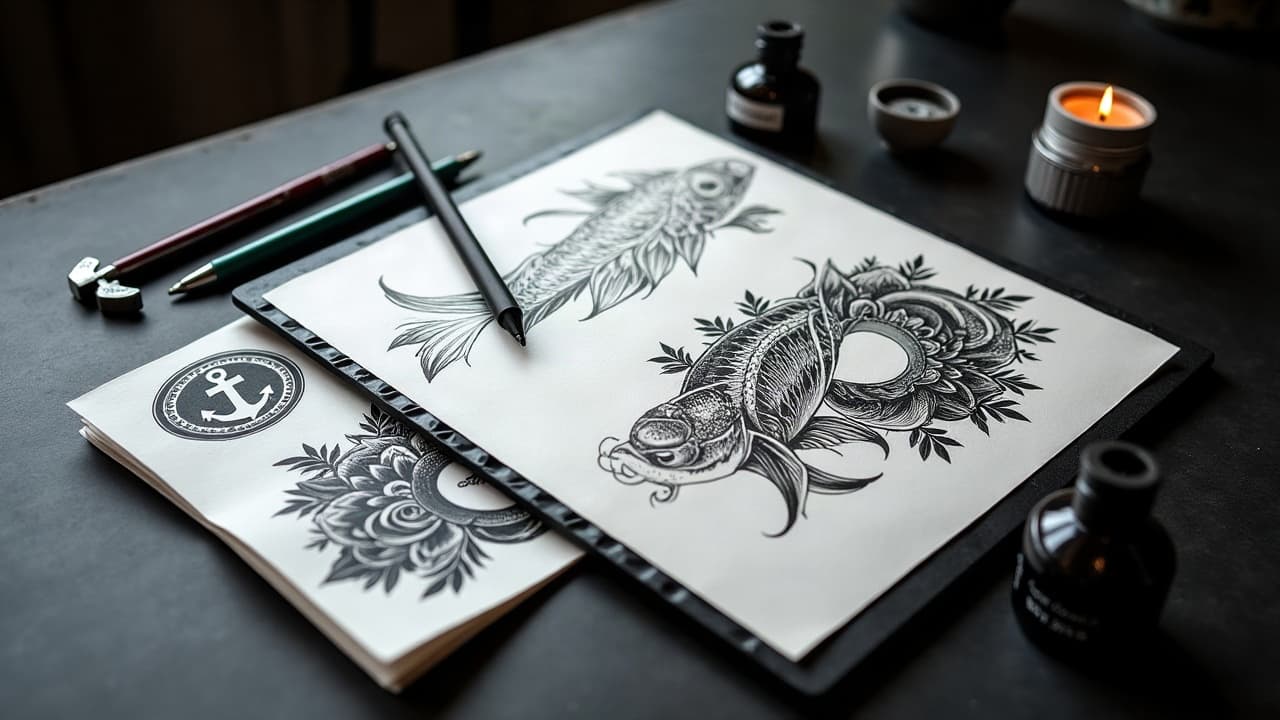
Roughly one in three U.S. adults wears ink, according to broad polling by the Pew Research Center. More clients means more niche briefs, and AI will miss the brief unless you scale your prompt to match the style’s lineage. The fix is not five paragraphs of adjectives. It is a compact scaffold of style tokens, constraints, and weights that pushes the model to respect line weight, palette limits, and tattooability.
What “scaling” an AI tattoo prompt actually means
Scaling a prompt is the deliberate layering of a base concept, style modifiers, constraints, and weights so the model locks onto a tradition instead of inventing one. In tattoo terms, it is the difference between generic roses and a rose that reads American Traditional across the room. You will use small, high‑impact controls like seed lock, aspect ratio 2:3 or 3:4, CFG scale 6–9, and negative prompts that remove gradients or photoreal volume when the style needs flat ink. In tools like Stable Diffusion, Midjourney, Adobe Firefly, and ComfyUI (non-sponsored examples), think of scaling as moving from a sketch brief to a print‑ready flash spec. For production sanity, keep a style sheet per client. Save the exact tokens, stylize 50–150, and reference weights you used. This creates repeatability across a set, especially sleeves or backpieces that demand consistency.
- Use a short base: subject, pose, composition, viewpoint. Then add a separate line for style lineage and tattoo constraints.
- Save and reuse seeds for consistency. A locked seed means the next tweak shows a true delta, not random noise.
- Write negative prompts that match the style. For Traditional, ban gradients. For realism, ban hard outlines and posterization.
- Set aspect ratio to match placement. 2:3 reads forearm well, 3:4 fits upper arm or calf, 1:1 helps centered chest pieces.
- Preview at print scale. Zoom to 100 percent and judge line legibility at 1–2 mm stroke, not at screen zoom.
Scaling prompts for realism and black‑and‑gray
Realism falls apart when prompts confuse camera with ink. Anchor the model in photographic logic, then taper to tattooable forms. Start with lighting language like rim light, soft key, and HDR, then control plasticity so pores do not become noise that a needle cannot resolve. In Stable Diffusion with ControlNet (non-sponsored example), feed a clean edge map or depth map from your reference. Use reference weighting 0.6–0.8 so the model respects contours without copying. Set CFG scale 7–8 and denoise 0.35–0.5 on upscales to keep microtextures believable. For black‑and‑gray, specify no color ink, smooth value steps, and soft transitions over hard lines. Many pieces read better with implied edges, not outlines. Remember that very fine pores and flyaway hairs will either blow out or heal away.
- Base: “portrait of an elderly sailor, 3/4 view, soft Rembrandt lighting, shallow depth of field, detailed skin, calm expression.”
- Style: “hyperrealistic black‑and‑gray, soft transitions, no outlines, no posterization, film grain minimal.”
- Constraints: “tattooable at 18 cm height, avoid micro‑pores, avoid stray hairs, consolidate midtones, background low contrast.”
- Weights: “reference image 0.7, detail 1.2, skin smoothing 0.1, grain 0.05, CFG 7.5, seed lock on.”
- Check: print at 100 percent. If any texture is under 0.3 mm, simplify the plane or merge tones before stencil.
Traditional and neo‑traditional: palette and line weight first
American Traditional is about readable silhouettes, chunky lines, and a restrained palette. Name the lineage explicitly, like “Sailor Jerry, 1940s flash logic”, and set a limited palette 5 inks. Tell the model to avoid volumetric shading and gradients that do not live in Traditional. For neo‑traditional, add soft rendering and expanded palette but keep heavy outlines and graphic shadows. If you are in Midjourney (non-sponsored example), keep stylize around 100–150 so the model ornaments without sneaking in realism.
- Base: “swallow and rose, flying left, banner reading ‘hold fast’.”
- Style: “American Traditional, bold 7RL look, flat fills, minimal shading, Sailor Jerry influence, 1940s flash sheet feel.”
- Constraints: “palette black, red, green, yellow, blue only, no gradients, no drop shadows, no soft edges.”
- Weights: “color flatness 1.4, line integrity 1.6, negative prompt: glow, lens flare, 3D bevel.”
- QC: Reduce fine feathering. If the feather barbs vanish under 1 mm, simplify to larger shapes before stencil.
Abstract and watercolor: edges, paper logic, and negative space
Abstract tattoos need hierarchy and restraint or they collapse into a color cloud. Scale prompts with edge taxonomy such as hard edge, feathered edge, and dry‑brush. Specify paper tooth or cold‑press watercolor texture only if you know how it will translate to skin, otherwise request ink‑like diffusion instead of paper grain. Watercolor prompts should control blooms. Use phrases like controlled blooms, splash radius 5–10 mm, no muddy blends, and no outlines if that is the brief. To keep palettes clean, align hues with a triad or analogous scheme and lock it. See our color and texture prompt guide for reliable harmony sets.
- Base: “abstract koi motion trail across forearm.”
- Style: “watercolor, negative space silhouette, controlled blooms, feathered edges, no hard outlines.”
- Constraints: “triadic palette cyan‑magenta‑yellow, max 3 hue families, splash radius 8 mm, avoid brown mud, respect skin gaps.”
- Weights: “color harmony 1.3, edge softness 1.2, blend limit 0.8, negative prompt: paper texture, canvas weave.”
- QC: Print at size. If two hues merge into gray at 100 percent, separate by 10–15 percent more value contrast.
Blackwork, geometric, and dotwork: precision grids and readable math
Geometric reads clean when your prompt defines the math. Declare radial grid 12‑fold, isometric lattice, or Penrose tiling, then bind line weights. Ask for uniform stroke 0.4–0.6 mm, no taper, and consistent dot density if stippling. If you model in Procreate or Affinity Designer before AI pass‑throughs (non-sponsored examples), export clear vector guides for ControlNet to respect. Symmetry matters. For forearms and calves, set vertical axis lock and reference the body curve. For additional placement logic, see our symmetry and placement guide.
- Base: “sacred geometry mandala, forearm wrap.”
- Style: “blackwork, dotwork fill, uniform stroke, high contrast, no gray wash.”
- Constraints: “radial grid 12‑fold, stroke 0.5 mm equivalent, dot density 35–45 percent, negative prompt: waviness, wobble, blur.”
- Weights: “grid adherence 1.6, line integrity 1.8, seed lock on, CFG 8, denoise 0.25 on upscale.”
- QC: Wrap a paper mockup. If moiré patterns appear at 40–60 cm viewing distance, adjust spacing or line weights before stencil.
Tokens, weights, and settings that move the needle
Stop guessing. Small numeric nudges do most of the work. In Automatic1111 for Stable Diffusion or ComfyUI (non-sponsored examples), parentheses weighting 1.1–1.6 around critical tokens shifts attention without turning the image surreal. Lock a seed when iterating style, vary the seed only after content is final. Use CFG scale 6–9 for stylistic control without crushing texture. In Midjourney, start stylize 50–150 for Traditional or Blackwork, 150–300 for Abstract, and keep chaos 0–15 for repeatability. Image prompting is worth learning. Blending an inked flash reference at 1:2 with your sketch often lands the lineage faster than adjectives. For sleeves, build a prompt schedule that repeats tokens across panels to keep a shared visual grammar.
- Style emphasis: (American Traditional:1.5) or (black‑and‑gray realism:1.3) applied once, not in every clause.
- Palette control: “limited inks 4–6” plus “no gradients, no glow” to keep fills tattooable.
- Negative traps: ban “micro‑texture, pores, flyaway hair, bevel, drop shadow” for realism that will heal clean.
- Reference mix: image weights 0.5–0.8 let the AI adapt, 0.9–1.0 forces copying that often breaks anatomy.
- Upscale hygiene: low denoise 0.2–0.35 on upscales preserves edges. High denoise invents noise you cannot tattoo.
Tattooability checks: skin, ink, and healing reality
A design that wins on screen can still fail on skin. Run a healing window 14–30 days in your mental model. Large flat fills, pastel watercolor, and ultra‑fine stipple all heal differently. The American Academy of Dermatology notes common tattoo complications, including allergies and blowout, which are more likely with heavy saturation or over‑worked skin. Review their overview at the AAD site for a health baseline. Regulatory context helps you set client expectations. The FDA tracks tattoo ink safety and pigment advisories. Clients who ask why you avoid certain blues or reds get a clear answer when you point to FDA tattoo ink information. For aftercare and healing timelines, medical explainers from sources like the Cleveland Clinic support your shop instructions.
- Print test at 100 percent. If a line will heal under 0.25–0.3 mm, fatten it now.
- Reduce micro‑noise. Pores, stray hairs, and tiny veins do not hold. Merge them into planes or soft value transitions.
- Flatten gradients for Traditional. Too many steps read as bruising in the first 7–10 days of healing.
- Simplify watercolor overlaps. Keep two‑hue meets crisp, or separate them with 2–3 mm negative space.
- Check long‑term readability. At 1 meter, does the silhouette still read the intended style instantly?
From consult to print: a repeatable AI workflow
Treat AI as your sketch assistant, not your final line. Kick off with a 15‑minute consult and a single‑sentence brief. Build a base prompt, add style tokens, then scale constraints and weights. Iterate in 2–3 rounds with a locked seed so feedback actually moves the image toward the brief instead of sideways. Budget matters. Expect $5–$30 in AI credits per complex piece and a $50–$150 design consult fee depending on your market. Keep clients in the loop with print‑scale PDFs. For dimension and cast shadows that wrap the body, see our depth and dimension guide.
- Round 1: two seeds, clean lineage tokens, quick thumbs.
- Round 2: pick one seed, refine constraints, adjust weights by 0.1–0.2 per lever.
- Round 3: final polish, print‑size check, convert to clean stencil lines or value map.
- Virtual fit: run a fast try‑on to validate scale and curvature before booking.
- Hand‑off: export stencil, value study, and a one‑page style sheet for future additions.
Troubleshooting and QA for specialized styles
When a style keeps slipping, strip the prompt to base plus lineage, then rebuild one control at a time. Too many modifiers act like crosswinds. For bad hands or faces in realism, blend a clean reference at 0.6–0.8 and reduce stylization. Before you print, run a quick QA pass. View at arm’s length, then at 100 percent. Circle anything under 1 mm, any accidental gradients in Traditional, or any tangent that flattens a form in realism. If something looks like it would be painful to saturate, it probably will be. Save skin by simplifying.
- If the palette drifts, hard‑limit inks and add “no brown” or “no purple” as needed.
- If lines wobble, increase “line integrity 0.2” and re‑render at higher resolution before downscaling.
- If watercolor muds, reduce blend limit by 0.1–0.2 and move to analogous hues.
- If realism waxes plastic, add fine noise 2–3 percent and reduce skin smoothing by 0.1.
- If a sleeve loses cohesion, repeat three shared tokens in every panel, same seed family.
Ready to stress‑test your style tokens on a real body curve? Generate a design and iterate weights in minutes with AI for Tattoo. Then use the virtual try‑on to validate scale and placement before you book. Start a fresh prompt in Create or browse house styles in Styles for lineage‑clean baselines.
Try AI for Tattoo Free