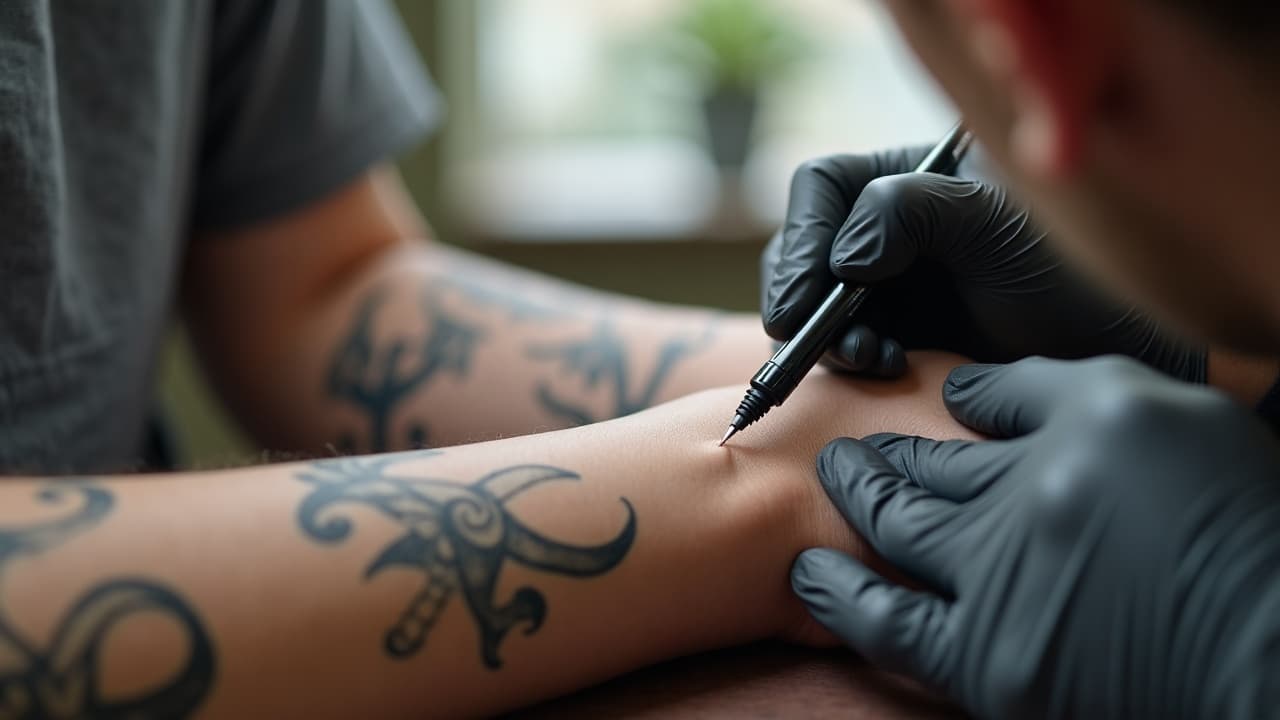
The most cohesive sleeves and body sets are usually built in phases, not marathons. In shops that specialize in large work, clients often stack pieces across 3 to 6 sessions over 6 to 18 months, letting skin recover and ideas evolve. You can keep that staggered timeline looking intentional by making three early choices: a clear anchor motif, mapped flow lines, and protected negative space that future pieces can breathe into.
Cohesion is not about matching tattoos like for like. It is about repeatable structure, a shared color language, and bridges that visually stitch pieces together. Think of it like composing an album. Each track has its own voice, but the story spine and mix tie everything together.
Start With an Anchor: Themes, Motifs, and a Story Spine
Choose one repeatable element that can echo, scale, or morph across your body. That is your anchor. It might be a single flower species, a geometric lattice, a wave form, or a mythic character set. A strong anchor makes later choices easy, because every new piece can reference it through silhouette, texture, or micro-details. If you love mixed styles, the anchor lives above the styles as a thematic thread.
- Anchor examples: a peony rendered in black and gray, then repeated as spot color, petal outline, or background stencil.
- A sacred geometry grid that reappears as fine-line ghosting between larger figurative pieces.
- A folklore set (kitsune, oni, tengu) linked by matching cloud shapes and repeating mask angles.
- A constellation map that recurs as tiny star clusters guiding the eye between bolder work.
Write a one-sentence story spine before you book the second session. Example: “Floral growth winding up the left side, crossing the collarbone, and dissipating into stars.” That sentence becomes your north star when choosing placement, scale, and filler. For composition fundamentals that keep anchors legible, see our composition guide.
Map Flow Lines on the Body, Not the Page
Draw your movement paths on the body first, then design to those paths. Bodies are not flat, so curved flow lines beat perfect rectangles every time. Follow muscle bellies, joint bends, and rib arcs. The forearm likes a helix that climbs to the inner elbow, the thigh prefers long diagonals that steer around the quadriceps, the ribs want slimmer S-curves that look good while breathing.
Designers often reference skin tension and wrinkle patterns when planning placement because lines that track natural movement tend to look smoother as you flex. For a deeper planning walkthrough, try our sleeve-focused breakdown in the 3D body mapping guide. If you are new to skin anatomy, the American Academy of Dermatology has accessible primers on structure that help you picture how tattoos sit in the dermis, see the AAD’s resources at aad.org.
Use Negative Space, Gaps, and Bridges Intentionally
Empty skin is not wasted space. It is your oxygen. Carve out negative space early to outline pathways for future flow, like a river you will later fill with stones and plants. Then add bridges that connect independent pieces without overwhelming them. If you plan a future chest panel, leave a one to two finger margin along the sternum so the new work can key in cleanly.
- Bridging textures: smoke tendrils, wind bars, and water ripples that taper and fade.
- Pattern connectors: dotwork gradients, stippling halos, and light whip shading.
- Geometric rails: thin line spines that arc behind motifs and repeat at set intervals.
- Micro-motifs: tiny leaves, stars, petals, or scales to ease awkward gaps.
Keep bridges in a lower key than your focal motifs. If your main pieces live in bold blackwork, let the bridges live in 50 to 70 percent gray or a softer line weight, so the eye reads hierarchy correctly.
Color Harmonization That Survives Time
Agree on a restricted palette before you start stacking color work. Two dominant hues plus a neutral is easier to sustain across years than a full rainbow. Think deep teal + maroon + warm gray, or sepia + olive + gold. If you love variety, move contrast to value, not hue. Aim for consistent contrast ratios so old and new pieces feel calibrated even as pigments age.
Different pigments fade and shift at different rates. Reds and yellows can age faster in sun, while dense black often softens to charcoal. The FDA tracks safety and pigment considerations for tattoo inks, see their overview at FDA guidance on tattoos and permanent makeup. The AAD notes that allergic reactions and sensitivities occur most with red pigments, another reason to keep a coherent plan and test small before committing, review basics at aad.org. For practical care that preserves color, consumer health editors at Healthline routinely emphasize UV protection and moisturization as first-line maintenance.
Skin tone matters for palette choices too. High-chroma pastels can wash out on deeper complexions, while saturated jewel tones and crisp linework read beautifully. If you want help predicting contrast on your tone, bookmark our color and linework guide for dark skin and our contrast and spot color tips.
Scale and Composition Across Time
Think in tiles, not only in single frames. A forearm can fit one large tile, two medium, or a cascade of smalls plus generous negative space. Decide the scale scheme now, then stick to it. If your anchor is medium florals, resist the urge to drop a giant biomech plate in the middle. Instead, echo your anchor at 120 percent for a hero piece, then 60 to 80 percent for supporting pieces flanking it.
- Reserve expansion lanes: leave 10 to 20 mm gutters beside seams and bony landmarks.
- Protect joint visibility: keep elbow pits and knee creases lighter to prevent muddiness.
- Pre-plan overlaps: sketch underlays for where future pieces can tuck beneath current ones.
Budget for cohesion too. Background tie-ins and soft bridges take time. Expect to invest $150 to $300+ per hour in most cities, and plan for 1 to 3 hours of connector work for each added piece. These smaller sessions are worth it, because they make a five-piece arm read like a single sleeve.
Line Language and Style Rules Keep You Consistent
Cohesion lives in line language. Commit to line weights and edge treatments and keep them consistent across artists. If your collection is fine-line, settle on a single-needle or 3RL look, plus a standard for tapering and breaks. For blackwork, decide how heavy outlines get, how hatching stacks, and when pure black fills appear versus textured blacks.
- Define weights: e.g., 0.25 mm micro-lines for details, 1.0 mm for contours, no heavier than 2.5 mm anywhere.
- Set shade recipes: light pepper shading for bridges, soft wash for background, solid pack only on anchors.
- Repeat edge motifs: sawtooth leaves, dot halos, or broken undertones that recur throughout.
If you rotate artists, share a one-page style sheet with needle groupings and examples. Plenty of top artists, from Chaim Machlev (Dottwo) to Nissaco, are known for strict grammar in their lines. Your sheet does the same job for your collection.
Strategic Filler and Backgrounds That Don’t Steal the Show
Great filler is quiet on first read and brilliant on the second. Keep backgrounds a step down in value and complexity from your focal work. On a Japanese-inspired arm, that might mean light-as-air clouds and subtle water waves that carry the eye. For geometric sets, faint isometric grids behind bolder shapes add rhythm without clutter.
Plan care and logistics for these sessions too. Bridges and fillers can be tender because they wrap sensitive zones. Expect pain 4 to 7 out of 10 depending on placement. The top layer typically calms in 7 to 14 days, with deeper settling across 4 to 6 weeks. For general recovery timelines and when to see a clinician, the Cleveland Clinic offers reliable guidance at clevelandclinic.org.
- Background recipes: 30 to 50 percent gray wash, large magnum sweeps, and open grain left visible.
- Aftercare standbys: Saniderm, Bepanthen, Aquaphor, Hustle Butter (non-sponsored examples).
- UV habits: SPF 30+, reapply every 2 hours, avoid midday peaks to protect long-term color harmony.
Thematic Variations Without Losing the Thread
You can absolutely mix realism with geometry or old school with illustrative. The trick is to vary within boundaries. Keep one constant across all pieces, like palette, contour weight, or background texture. Then let style be the variable. A black and gray portrait can sit beside a color floral if both share the same smoky bridges and line weight at the outer silhouette.
Test severity on paper, then on skin in small doses. If a high-chroma addition risks hijacking the arm, reduce its saturation by 20 to 30 percent or relocate the pop color to a controlled detail like an eye, gem, or petal tip. This keeps your visual rhythm intact.
Coordination, Budgets, and Files So Nothing Gets Lost
Treat your collection like a design project. Keep a single folder with your anchor references, color swatches, and process photos. Save stencils and Procreate layers, and label them by body zone. Photograph healed pieces in consistent light so you can match value and texture at the next appointment.
- Pre-session checklist: body map with flow lines, anchor sheet, and palette swatches.
- Budget cadence: one focal piece per 8 to 12 weeks, one connector session between.
- Cross-artist handoff: share your style sheet and two healed photos of nearby work.
Before you commit to skin, run dress rehearsals. Use a transparent film or digital mockups to overlay bridges and negative space on your actual body photos. If you want a fast, accurate preview, try our virtual sleeve workflows in the AI for Tattoo ecosystem. You can generate anchors and connectors, then test wrap and scale using our creation tools and the camera-based try-on.
Safety, Allergies, and Color Choices
Cohesion should never come at the expense of your skin. If you are planning recurring color families, remember that red and some yellow pigments are the most common culprits for allergic reactions, per the AAD’s dermatology guidance at aad.org. Discuss test dots or micro elements with your artist before committing to large, repeated colors.
If you have a history of keloids or scarring, flag that up front. Placement and needle strategy can be adjusted to reduce trauma. For clinical risk basics and when to get medical attention, the Cleveland Clinic’s tattoo safety overviews at clevelandclinic.org are plain-language and reliable.
Ready to see how your anchors, bridges, and palette actually flow together on your body, not just on paper? Generate concepts with **AI for Tattoo**, place them with precision, and test wrap and negative space in minutes using [Create](/create) and instant [Try-On](/try-on). Build your collection with intention before the needle ever touches skin.
Try AI for Tattoo Free