
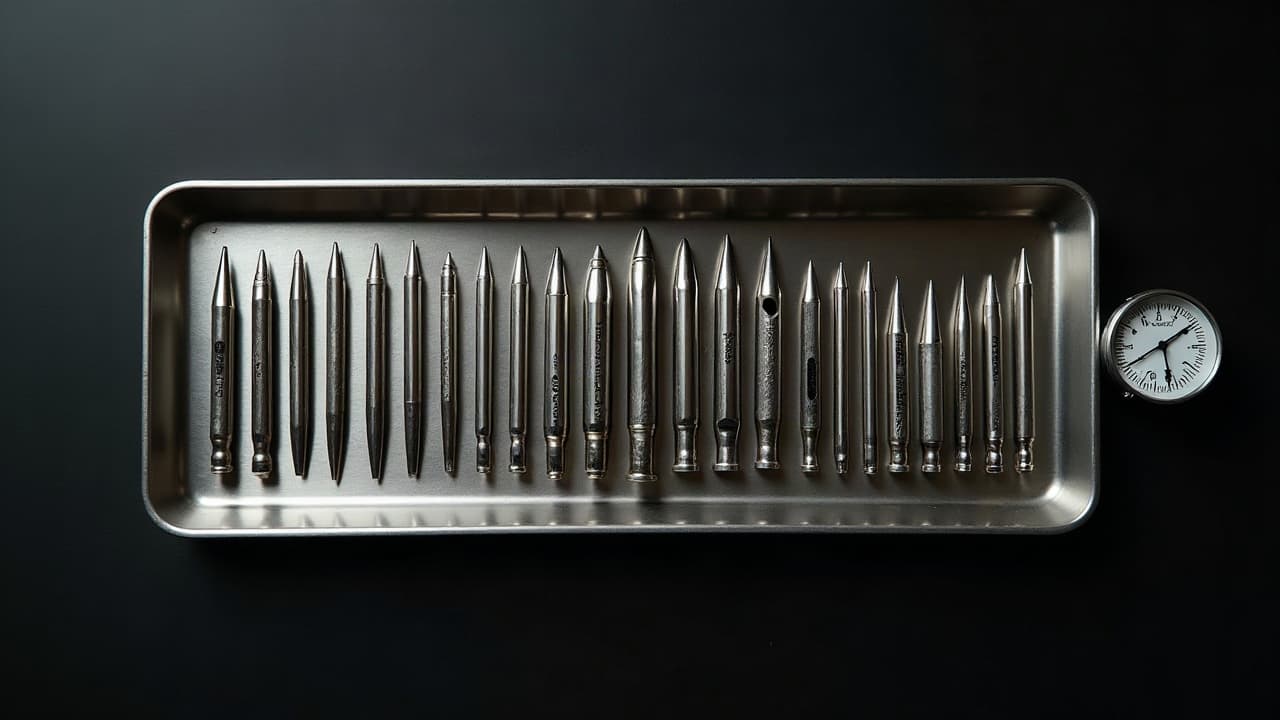
Most working artists swap between 3–5 different needle setups in a single tattoo to control line weight, texture, and saturation. Needles drive everything. They puncture skin 50–3,000 times per minute, so the right configuration keeps lines crisp, blends smooth, and trauma low. If you understand needle types, sizes, and tapers, you can predict the finish on skin and plan a cleaner heal.
How Tattoo Needles Are Built and Named
Tattoo needles are clusters of tiny steel pins soldered to a bar or contained in a cartridge. They come labeled by diameter (the “#” or gauge), count (how many pins), taper (how sharp and long the point), and configuration (how pins are arranged). Diameter controls ink flow and puncture size, taper influences how gently ink is delivered, and configuration decides line shape or shading character. Common diameters you’ll see: #12 = 0.35 mm, #10 = 0.30 mm (often called bugpin), #8 = 0.25 mm, and sometimes #6 = 0.20 mm for ultra fine work. Larger diameter pushes more ink, smaller diameter favors precision and soft blends. Tapers are listed as short, medium, or long. As a working shorthand, short is roughly 1.5–2.0 mm, medium 3–4 mm, long 5–7 mm. Longer tapers penetrate a touch cleaner and can feel smoother, especially for grey wash and soft color.
Configurations 101: RL, RS, Flats, and Magnums
Configuration shapes the mark each pass leaves. Rounds stack into dots and lines, flats and magnums spread into rectangles and fans. Knowing what each does prevents overworking and reduces the need for aggressive passes.
- RL (Round Liner), tight circular grouping. Use for crisp lines, micro text, and small details. Common sizes: 3RL–9RL. Pair with #10 bugpins for fine detail or #12 for bold traditional lines.
- RS (Round Shader), round grouping with a wider spread than RL. Good for soft shading in small areas, pepper shading, and packing in curves where a mag won’t fit.
- F (Flat), a single straight row. Great for geometric linework, whip shading along edges, and tidy color seams. Sizes like 5F–13F are common.
- M1 (Magnum), two rows in a straight stack. The workhorse for smooth shading and color packing over medium to large fields. Think 7M1–23M1.
- RM or M1C (Curved/Soft Magnum), magnums with a rounded edge. Softer blend and lower chance of corner trauma. Excellent for black and grey and healed-smooth color transitions.
- M2 (Double Stack Magnum), pins packed tighter. Lays dense color quickly, but adds trauma if you linger. Use when you need high saturation in fewer passes.
Diameter, Taper, and Needle Count: What Changes on Skin
Three variables change how skin accepts ink and how the tattoo heals: diameter, taper, and pin count. Larger diameters and higher pin counts move more ink per pass, which speeds coverage but raises trauma if you hover. Small diameters and long tapers feed ink gradually and can be forgiving during blends. A few practical examples to anchor choices:
- For tight script, a 3RL #10 long taper rides the epidermis cleanly and minimizes blobby endpoints.
- For bold neo traditional lines, a 9RL #12 medium taper builds that weight in one steady pass with fewer shakes.
- For black and grey portraits, a 15RM #10 long taper feathers edges gently for velvet gradients.
- For solid color fills, a 13M1 or 15M1 #12 medium taper packs saturation with fewer passes.
- For geometric shading bands, a 7F #10 long taper gives uniform passes with easy whip shading.
Match the Needle to the Style
Different styles favor specific edges and textures. Use the pairings below as starting points, then adjust for skin thickness and placement. If you are planning mixed styles, check how your contrast reads at sketch stage so the line weights don’t fight one another. Our guide on tattoo design contrast techniques for unique visuals shows how weight and texture choices map to readability.
- Fine line and micro script, 1RL–3RL #8–#10 long taper. Aim for gentle depth, consistent stretch, and minimal passes.
- American traditional lines, 7RL–11RL #12 medium taper. For fills and whip, 7M1–13M1. Keep speed steady to avoid chew.
- Black and grey realism, 9RM–17RM #10 long taper plus a 5RS or 7RS for tight corners. Build tones with pendulum shading and light whip shading.
- Dotwork and stipple, 3RS–7RS #10 with diluted black. Use consistent hand speed for even dot size.
- Color realism, 13M1–17RM #12 for big fields, a 7F to edge blends, and small 5RL–7RL for hairline details.
- Neo trad and illustrative, 9RL #12 for primaries, 5RL #10 for secondary details, and 11RM–15RM for buttery gradients.
- Blackwork fill, 15M1–23M1 #12 for fast coverage. Watch heat buildup and wipe with chilled sterile water to reduce irritation.
Technique Variables That Matter
Great results come from needle choice plus technique. Most lining sits near a 45 degree angle with a consistent stretch. Shading prefers shallower angles with pendulum or small circular motions, feeding ink gradually. Depth should consistently hit the upper dermis, roughly 1–2 mm, to avoid blowouts or fallouts. If you notice instant pooling, lighten hand or reduce voltage. Machine pairing also matters. Shorter stroke 2.5–3.0 mm rotaries can feel soft for grey wash and tiny liners, while 3.5–4.0 mm suits bold lines and packing. Coils deliver a snappy hit that many still prefer for thick lining. Whatever you run, keep your voltage steady and let the needle do the work rather than burying depth. For skin safety, remember tattoos are controlled wounds. Overworking increases inflammation and slows healing. The American Academy of Dermatology notes infection and allergic reactions as real risks, especially with excessive trauma or contaminated tools. Read more from the source at the AAD.
Trauma, Pain, and Healing Windows
Needle choice changes trauma patterns. Big magnums spread impact and can feel like a burn if you hover, while small liners can sting sharply. Most clients describe mag shading as 4–6 out of 10 and bold lining as 6–8 out of 10, depending on placement. Balance your setup to finish areas quickly without reworking. Healing time is influenced by trauma and aftercare. The outer layer typically closes in 7–14 days, with full settling around 4–6 weeks. Watch for redness that worsens, spreading warmth, or pus. These are warning signs identified by clinicians at the Cleveland Clinic. Keep the area clean, moisturized, and protected from friction. Product picks that consistently work in studio (non-sponsored examples): Saniderm for first 24–72 hours if your artist uses wraps, gentle wash and pat dry, then Bepanthen or Aquaphor thinly during days 3–7, switching to Hustle Butter or Mad Rabbit after that if you like a lighter feel. Always follow your artist’s specific routine.
Cartridges, Sterility, and Quality Control
Use single-use, EO-sterilized cartridges with intact blister seals and visible lot numbers. A good cartridge has an internal membrane to prevent ink and blood from wicking back into the grip or machine. This protects you and maintains machine hygiene. The U.S. FDA provides broad guidance on tattooing safety and contamination risks, a useful read for clients and artists alike. Reference the agency’s materials at the FDA. Reliable cartridge brands to consider (non-sponsored examples): Cheyenne, Kwadron, Bishop Da Vinci V2, TATSoul Envy, EZ. Many shops standardize on one or two so hand feel stays predictable. Pricing is usually $1–$3 per cartridge in bulk, with premium models at $4–$6. If a cartridge feels gritty or inconsistent, bin it. Your skin and the outcome are worth more than saving a dollar. For broader safety context and complication data, professional sources like JAMA Dermatology track tattoo-related reactions and treatments. General consumer coverage from Healthline also summarizes needle basics and aftercare in plain language.
Plan the Setup With Your Artist and Your Design
If you want razor-thin micro script but also saturated black fill in the same session, plan sequencing and needle swaps before you start. Communicate priorities, like “line integrity over speed,” or “smoothest possible blend on cheeks.” Our piece on navigating tattoo artist communication best practices gives a simple framework for these pre-session talks. At the design stage, preview line weights and shadow shapes so your needle map is obvious. Build line hierarchies into the stencil, for example bold primaries, medium secondaries, fine tertiary details. This keeps you from improvising under pressure and overworking edges. If you are testing style blends, see how different textures read at size and distance. Our guide to tattoo style blending techniques for unique designs shows clean ways to merge illustrative, realism, and ornamental lines without mudding the read.
Map your line weights and shading plan before you sit. Use AI for Tattoo to generate a version with bold, medium, and fine outlines, then virtually place it on your body. Try it now, generate in minutes at Create, and preview placements instantly with Try On.
Try AI for Tattoo Free