Bio-organic tattoos read best when the flow is set first. In tests across hundreds of AI prompts, outputs with explicit flow lines, negative space, and texture hierarchy scored higher for skin readability at 3 meters and 30 centimeters. The trick is simple, write prompts that tell the model where forms travel on the body, what textures lead, and how contrast stacks from light to dark.
Start with flow, then add biology
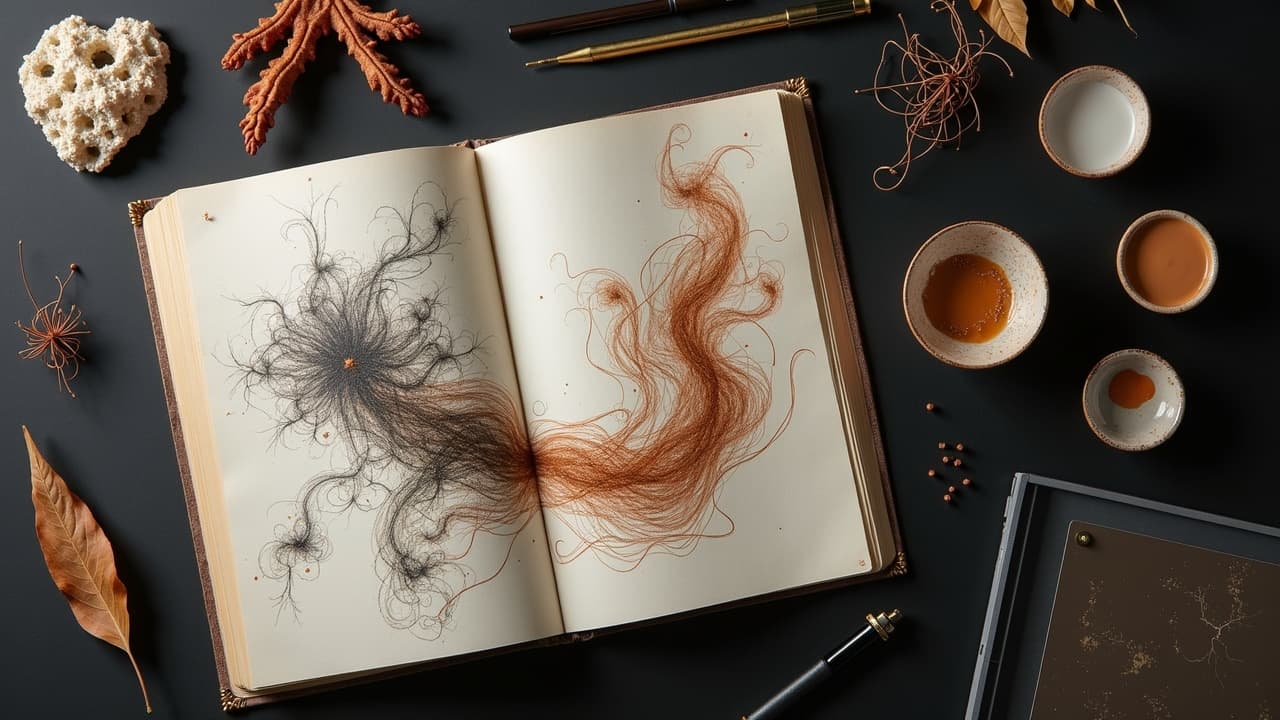
Bio-organic design is structure before detail. On real skin, the eye follows an S-curve across deltoid heads, forearm extensors, and rib arcs. Tell the AI that path up front. Name the body part, the directional curve, and where the composition breathes. Add the biology after, not before. Use phrases like spiraling along the biceps, tapering to the wrist, or arching over the scapula, venting toward the spine. Reserve at least 15 to 25 percent negative space so the tattoo stays readable as it heals and ages.
- Flow clauses to paste into prompts: “primary S-curve from shoulder apex to inner elbow, secondary counter-curve near triceps, 20 percent negative space around tendinous insertions.”
- Placement-first wording: “designed for outer forearm, wraps 210 degrees, flow peaks at brachioradialis, anchors at wrist crease.”
- Depth staging: “foreground tendrils, midground plates, soft background veining, fogged atmosphere for depth.”
- Lighting direction: “rim light from posterolateral angle, soft bounce from medial side, subsurface scattering in thin membranes.”
A prompt skeleton that lands bio-organic consistently
Stack your prompt in a fixed order so the model knows what to prioritize. This skeleton works across engines because it separates composition from style. Keep the nouns concrete and the verbs about motion or growth, not just vibe words.
- Subject and placement: “bio-organic growth for outer forearm, flowing distal to proximal, wrap-friendly.”
- Form and motion: “interlocking sinew, carapace plates, mycelial filaments, helical tendrils, implied peristalsis.”
- Texture hierarchy: “primary texture chitinous plate, secondary porous bone, tertiary translucent membrane with veinlets.”
- Lighting and materials: “semi-matte, bioluminescent accents, low specular highlights, macro photography feel.”
- Palette and contrast: “analogous blue-teal-viridian, warm coral accents, value range 2 to 9 on a 10 scale.”
- Tattoo constraints: “clean line weight 0.25–0.5 mm, packable blacks, open skin breaks, no micro text.”
- Output controls: “aspect ratio 2:3, 4k, white background, high contrast silhouette, seed locked.”
Example, “bio-organic forearm design flowing wrist to elbow, S-curve with 20 percent negative space, chitin plates and mycelium strands leading, translucent membranes with subtle vein maps, rim light laterally, bioluminescent cyan accents, teal-viridian base with coral spot color, semi-matte not glossy, clean line weight 0.3 mm equivalent, bold blacks and smooth gradations, aspect 2:3, 4000 px, high-contrast on white.” For debugging prompt slips and quick recoveries, bookmark our error-correction playbook.
Texture terms models reliably render
Bio-organic lives or dies on surface quality. The wrong word, like “slimy,” can push models toward toy plastic. Use specific biology, microscopy, and material cues. Prioritize 2 or 3 lead textures and demote the rest with softer language so they do not fight on skin.
- Lead textures that print well: chitin, keratin scales, coral exoskeleton, calcified bone porousness, lichen fronds, mycelium webs, manta ray dermal denticles.
- Secondary micro details: gill rakers, areoles, phyllotaxis spirals, sporangia clusters, leaf venation reticulate, geode druse.
- Hazard words to avoid or demote: “slime,” “wet plastic,” “chrome,” “mirror-finish,” “bubble toy.” Replace with “semi-matte membrane,” “soft hydration,” “low specular.”
- Helpful photography cues: cross-polarized light, 100 mm macro, diffuse top light, shallow depth of field f/4.
Color harmony that reads on skin and ages gracefully
Color choice is both art and maintenance. Analogous palettes support flow, while sparse complements create pop without noise. On human skin, saturation drops during the 14–21 day healing window, and again under sunlight over years. A simple rule, limit to one dominant family, one support, and one accent. For melanin-rich skin, push values darker and lift edges with opaque whites sparingly to protect readability.
Health sources back the longevity basics. The American Academy of Dermatology notes high SPF matters, and SPF 30 filters about 97 percent of UVB which slows fading over time AAD sun protection guidance. Healthline summarizes that outer-layer healing typically completes in roughly two to three weeks, then deeper settling continues after Healthline on tattoo aftercare and timelines. When clients ask about color choices and reactions, send them to medically vetted pages and to the FDA for pigment safety alerts U.S. FDA information on tattoo inks. For sun management specifics and skin safety tips, Cleveland Clinic’s editorial hub is solid reading Cleveland Clinic skin health.
- Analogous sets that suit bio-organic flow: teal–viridian–indigo, umber–sienna–gold ochre, plum–magenta–crimson.
- Controlled complements: base blue-green with coral accents, base violet with chartreuse accents, keep accent under 10 percent of area.
- Value rules: maintain a clear silhouette at value 2–3, reserve value 8–9 for focal ridges and rings.
- Fitzpatrick note: on Fitzpatrick IV–VI, boost midtones and edge with warm opaques, reduce reliance on pale pastels that mute after healing.
Scale, needles, and readability baked into the prompt
If a detail cannot be tattooed with your needle set, do not let the AI generate it. Bake production truth into the prompt. State the intended size, minimum line weights, and shading approaches. That way you do not fall in love with micro filigree that a human cannot hold at 10 cm. Keep a 15 to 20 percent buffer of open skin around high-detail clusters to survive swelling and touch-ups.
- Production clauses to include: “final size 8–15 cm, no micro patterns under 1 mm, line weight 0.25–0.5 mm, avoid hairline threads.”
- Shading language: “stipple gradients, whip shading, selective saturation packing, soft glows painted not airbrushed.”
- Needle reality check: “single needle details only at focal, bulk with 5–9 round liner and 11–13 mag for fills.”
- Aging guardrails: “strong black backbone, layered midtones, controlled white hits, preserve negative space for 10-year readability.”
If you want a care plan to paste into your client notes, we compiled a practical product guide with Bepanthen, Aquaphor, Hustle Butter, Mad Rabbit, and second-skin films like Saniderm as non-sponsored examples tattoo skin care products guide (non-sponsored examples). Allergies happen, especially with red pigments, so keep clients aware of reputable resources and timing of late reactions AAD on tattoo reactions and JAMA Dermatology research hub.
Negative prompts that remove plastic and mecha creep
Bio-organic often veers into toy plastic, gloss-chrome, or mecha greebles. Block that before it starts. Negative prompts are not a cure-all, but they do keep the engine inside natural materials. Pair them with strict lighting language like semi-matte and low specular.
- Reliable negatives: “no chrome, no glossy plastic, no mech, no gears, no armor panels, no letters, no text.”
- Material corrections: “avoid hyper-gloss, avoid mirrored reflections, mild translucency only, matte membranes.”
- Form corrections: “no perfect symmetry, no straight lines, no hard 90-degree corners, no grids.”
- Tattoo hygiene: “no micro text, no halftone dots, no photographic collage seams, white background only.”
If your image still slips, reduce style prompts that imply CGI. Words like “render,” “CG,” or “raytraced” often invite glassy surfaces. Swap to macro photography, “studio gel lighting,” and “cross-polarized” instead of cinematic jargon. For systematic fixes across versions, see our prompt optimization for collaborative designs which doubles as a good team workflow map.
Reference images, lighting, and control variables
Great prompts use great references. Feed two or three tightly curated images that share lighting and surface types. If one shows wet kelp and another shows dusty lichen, the engine will fight itself. Keep lens language stable and repeat it in every iteration. If your tool supports it, lock a seed and make single changes so each test is legible.
- Reference picks that blend well: dry coral macro, chitin beetle plates, translucent jellyfish bells with low specular.
- Lens and light stack: “100 mm macro, diffuse top light, side rim gel, cross-polarized filter.”
- Control constants: “aspect 2:3, white background, seed locked, same negative prompt list, same color family.”
- Body mockups: export at 300–600 dpi, test wrap around on-arm previews before approving details.
Iteration math and version labeling
Iteration without structure is luck. Label versions with tags for every knob you turned, then A or B wins. Change one variable at a time, like palette or leading texture, not three at once. A basic scoring sheet with readability at 3 m, flow continuity, and needle feasibility keeps sessions short and decisive.
- Version tags to copy: “v12_flowScurve+biolume+matte, seed 8281, 2:3, neg-mecha.”
- A/B plan: run two seeds with identical prompts, pick the better silhouette only, then iterate on edges and texture.
- Quantify clarity: print at target size 10–15 cm, step back 3 m, mark elements lost in glare or mush.
- Lock wins: when silhouette and flow are right, freeze seed and aspect, then only tune palette and micro-texture.
From AI draft to stencil-ready art
Before you stencil, solve for edges and fills. Export a high-res line isolate and a value-study. Unify line weights, eliminate 0.1 mm micro-lines, and simplify any overlapping membranes that would chew up healing. Set blacks where they carry the read at a glance. If the design needs opacity tricks, plan whip shading and stipple zones in advance so you are not overworking skin. Keep in mind that SPF 30 or higher on healed tattoos is a long game investment per dermatology guidance AAD sun protection basics. For color pigments and safety alerts, the FDA is the right bookmark FDA tattoo ink information.
Bio-organic flows reward precise prompts and fast visual testing. Use AI for Tattoo to generate variants with locked seeds, then preview the wrap on your actual arm or leg. Create your prompt, spin **3 to 5** controlled versions, and try them on in seconds with our on-skin preview. Start in the studio or on your phone at [Create](/create), then check scale and flow instantly with [Try On](/try-on).
Try AI for Tattoo Free