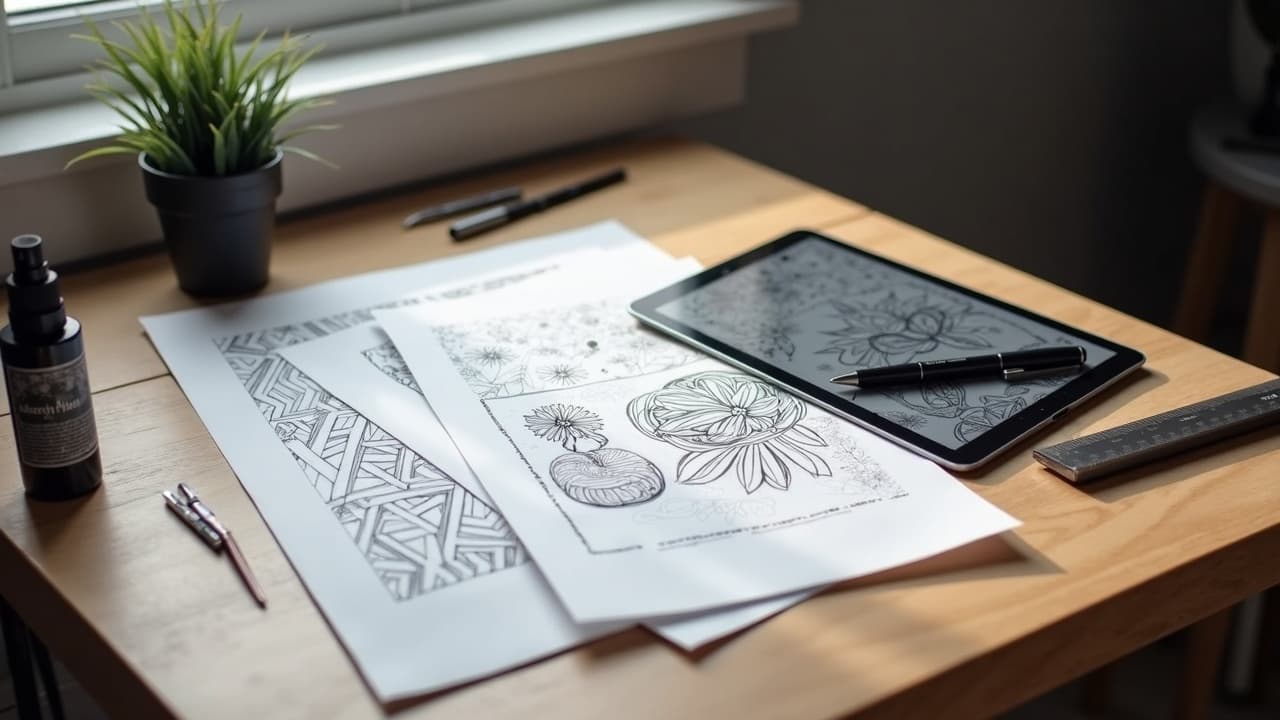
Good AI prompts cut the back and forth. In studio tests, artists who build a shared prompt brief with clients reach a usable concept in 2–4 iterations instead of ten. The trick is defining visual goals and technical constraints before you generate a single image, then keeping that language consistent through revisions. Below is the workflow I use with clients so AI becomes a fast sketch assistant, not a design crutch.
Start with a shared prompt brief, not a vibe
Great collaborative prompts begin with a concise prompt brief you both sign off on. Treat it like a one page spec that names content, style, placement, size, readability, and constraints. Ask the client for reference images they actually like, then translate why they like them into prompt language, for example high contrast, open negative space, single light source, or fine line crosshatching. Lock in tattoo realities early, such as minimum line weight and the impact of body curvature, so the AI drafts do not promise detail that will blur.
- Content: motif and meaning, for example Japanese peony with koi indicating resilience and renewal, no skulls.
- Style: blackwork, neo-traditional, watercolor, or fine line, plus 2 named artist influences for reference only.
- Placement and scale: forearm outer, 2–3 inches wide, vertical orientation, leave 5–8 mm clear margin to wrist crease.
- Readability: high-contrast silhouette at 1 meter, avoid micro-text smaller than 8 pt equivalent.
- Longevity constraints: line weight ≥ 0.25–0.35 mm, avoid dense stipple fields under 3 mm.
Anatomy of a high quality AI tattoo prompt
A reliable prompt is modular. Think of it as blocks you can swap without restarting the whole idea. I keep separate chunks for subject, composition, lighting, style tags, and tattoo constraints, then add negative prompts for what to exclude. That structure keeps the visual language steady while we test alternatives.
- Subject: clear nouns and actions, for example “red crowned crane landing among reeds, wings half open.”
- Composition: camera distance and framing, for example “three quarter view, vertical crop, strong diagonals, open top third for sky.”
- Lighting and surface: “single rim light from left, soft ambient fill, matte surfaces, high local contrast.”
- Style and medium: “neo-traditional linework, limited palette, muted warm tones, no photoreal skin texture.”
- Tattoo constraints: “clean silhouette, 0.3 mm minimum line, simplified overlapping feathers, avoid tiny gradients.”
- Negative prompts: “no extra birds, no text, no bokeh, no chromatic aberration, no drop shadows.”
If you are working in realism, add material cues and lens language, then filter them for tattooability. For detailed realism tips, see our prompt guide for realism. Always cap micro detail so the AI does not suggest pores, micro-hairs, or grain that will not hold up at 5+ years.
Style control with references and tags
Clients often bring ten different styles. Your job is to harmonize them. Use style tags that describe technique, not just era labels. Words like “bold outline, controlled color pack, limited shading steps, open negative space” are clearer than vague terms like organic. When naming artists as style references, position it ethically as inspiration, not imitation, and explain to the client how you will translate those moves into your hand. For broader visual vocabulary, browse Styles and save a shortlist to keep the reference field coherent across prompts.
If your model supports it, maintain a seed lock to keep pose and layout consistent while you change palette and linework. Compare versions at the same scale. Put the AI outputs into a grid at 100% print size in Procreate or Photoshop so the team can judge which details will actually read on skin.
Tattoo constraints the AI must respect
Tattooing is not paper. Enforce a small set of constraints inside the prompt so every draft is plausibly tattooable. Protect open skin areas, manage contrast, and avoid hairline shapes that will close up during healing. Build these into both the prompt and your critique language.
- Placement curvature: ask the AI for a mock wrap, “conforms to outer forearm cylinder, maintains silhouette from 30° side view.”
- Contrast mapping: “dark against light, light against dark,” plus a 3 value plan to survive sun fade.
- Ink behavior: reduce tight crosshatching and micro-stippling, prevent blowouts by avoiding ultra dense micro lines near flex points.
- Allergy and aftercare awareness: avoid heavy red saturation if the client has a history of reactions, per AAD guidance.
- Healing timeline: design for legibility through 2–3 weeks of cloudiness and peeling, per Cleveland Clinic guidance.
Remember, tattoo inks are regulated differently than cosmetics in many countries and some pigments are not FDA approved for injection. Check materials and communicate risks with clients, see the FDA tattoo and permanent makeup page for safety updates. When a client wants tiny text or micro portraits, link them to our context on scale and durability in first sleeve planning so expectations stay realistic.
Efficient iteration without losing the thread
Fast iteration is the point of AI, but you need a plan. Decide how many rounds you will do, what changes belong to the prompt versus the drawing stage, and how you will name files so you do not confuse versions. I bill an AI concept fee for 2–3 rounds of prompts, then move to hand refinement. It keeps scope healthy and decisions clear. For a deeper process, see our iteration techniques.
- Round 1, exploration: generate 6–8 small thumbnails, pick 2 for further work.
- Round 2, alignment: lock seed and composition, test palette and line density, deliver A/B pairs.
- Round 3, commit: freeze composition and silhouette, export high-res for trace and paintover.
- Version control: name files like client_date_seed_style_v2 to avoid mixups later.
- Stop rule: when silhouette and major value blocks are locked, leave micro detail for hand polish.
From AI draft to tattoo-ready linework
Treat the AI image as a sketch. Print at target size, then trace only what you can tattoo. I bring the image into Procreate, paint a three value map, and simplify overlaps. For machines that like vector, vectorize the final linework in Illustrator to check tangent traps and line joins. Set a base line weight of 3–5 pt at print scale for bold styles, thinner for fine line but still defensible. If the AI has micro-gradients, convert them to whip shading or dotwork fields large enough to breathe. This is where you swap impossible textures for tattooable patterns.
Watch for blowout risk zones, for example tight darks at wrist bends. Health sources like Healthline explain how blowouts look and why they occur. Good design minimizes that risk by easing pressure zones and avoiding ultra dense fills over thin skin. Plan aftercare talking points, covering wraps like Saniderm, and ointments such as Aquaphor or Hustle Butter (non-sponsored examples). Healing clarity returns in 2–3 weeks, then settling continues for 3–6 months, per medical sources like Cleveland Clinic.
Ethics, credit, and cultural responsibility
Clients deserve transparency about references and training data limits. Credit human influences in your brief and never copy an artist’s composition wholesale. Use AI as a roughing tool, then make the design your own in line, value, and flow. Be thoughtful with cultural symbols, especially sacred or community‑specific imagery. Share our explainer on context and boundaries, cultural reappropriation, and study motifs with our cross cultural comparison.
On safety and consent, remind clients that inks and pigments can produce reactions, and some colors are more implicated than others. The American Academy of Dermatology and the FDA both publish consumer guidance about allergic reactions and ink recalls. Build a simple intake that captures prior reactions and sun sensitivity so your color choices and shading plans align with skin health as well as aesthetics.
Pricing, timelines, and setting expectations
AI does not make custom work free, it moves effort to the front. I quote an AI concept fee of $50–$200 depending on scope, which covers briefing, references, and 2–3 prompt rounds. The tattoo price remains based on complexity and time. Put revision limits in writing so the project does not spiral. Explain that AI drafts are not final stencils, they are direction. Once the composition is locked, hand polish takes 1–3 hours for small pieces and longer for sleeves. Healing and touch up planning stays the same, with a check at 6–8 weeks.
Photos and try on, get scale right before you ink
Ask clients for a straight on, well lit photo of the placement area with a measured reference in frame, for example a ruler or credit card. Generate mockups at 1:1 scale so you can judge readability across distances. Use Try On to preview size and flow in seconds, then jump to Create to test prompt variants with the same silhouette. Encourage clients to live with the mockup for 48 hours to catch proportion or orientation tweaks before appointment day. If the design crosses joints, produce two mocks, arm straight and flexed, to confirm that the silhouette survives movement.
One last privacy note, do not upload face photos or identifying marks without consent. Government and medical sources remind us to protect personal health and biometric data. When in doubt, crop or blur, then store client images securely off public platforms.
Quality check, then commit to the stencil
Before you print the stencil, run a quick tattooability checklist. Do the lines have defendable thickness at final size, are value steps clear, will the focal point read at a glance, and did you remove all photo‑like artifacts. Confirm pigment choices that respect any allergy notes and reinforce sun resilience through contrast. For long term safety and material awareness, review the FDA’s consumer tattoo resources and keep a short aftercare handout that mirrors common guidance from sources like the Cleveland Clinic and the American Academy of Dermatology.
Ready to build a clean prompt brief and see it on skin. Use AI for Tattoo to generate concepts with controlled style tags, then preview true‑to‑scale placements with [Try On](/try-on). Kick off your session now in [Create](/create) and bring a tattoo‑ready draft to your artist.
Try AI for Tattoo Free