
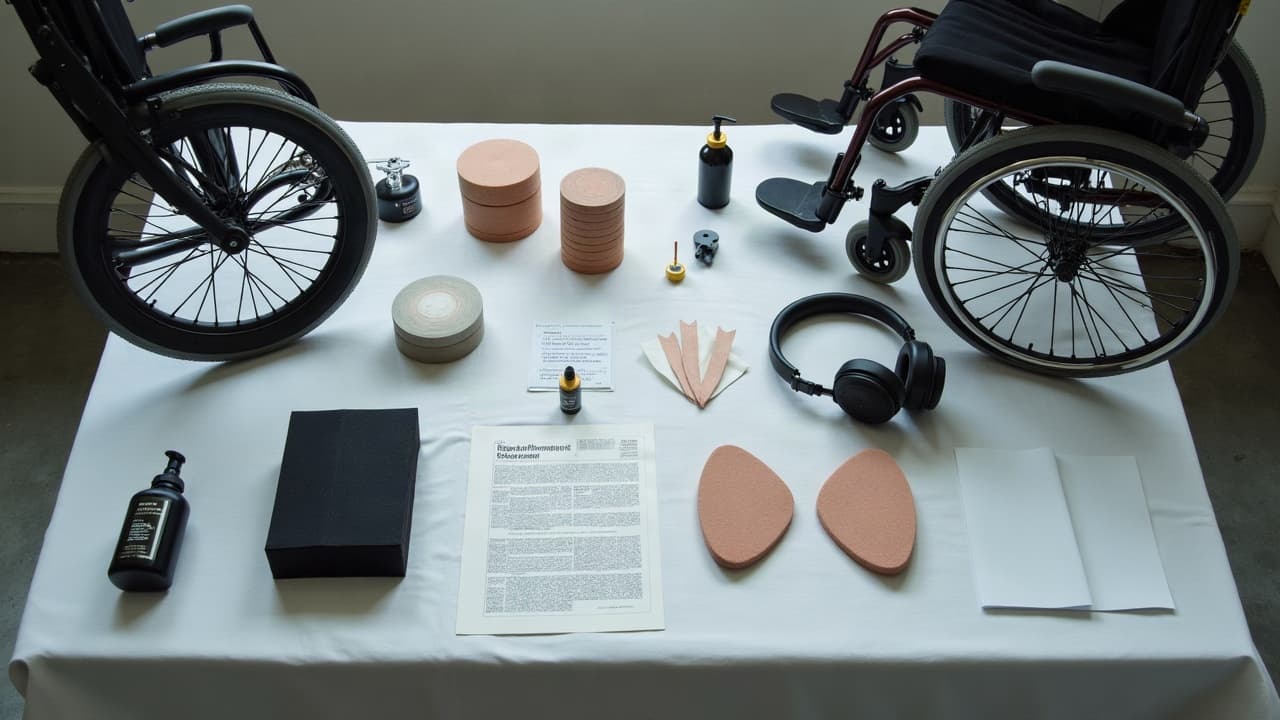
One in six people worldwide live with disability, and great tattoos are absolutely possible with the right plan. The most reliable sessions start before you sit, with clear communication, smart positioning, and comfort systems that match your body. If you need data to back that up, the World Health Organization consistently reports disability is common, so professional studios are already adapting for it. Your job is to make your needs visible and non-negotiable, then build a session that fits your capacity.
Book the right studio and ask access questions early
Access is part of design. Before you send references, confirm the physical setup will actually work for you. Ask about ramp access, elevators, an adjustable tattoo table, armrests that lock, and a bathroom you can turn around in. Many studios can reconfigure furniture or reserve the largest station if they know your requirements in advance. If scent sensitivity is an issue, request a fragrance-free cleaning cycle and give a list of no-go products. Pricing is another practical piece, since adapting a station can extend setup time by 15–30 minutes. Most artists do not charge extra for access, but longer bookings are typically billed at the standard hourly rate, often $150–250 per hour in major cities.
- Is there step-free entry, or can you set up a portable ramp if needed, and where is accessible parking located relative to the door?
- Do you have an adjustable, hydraulic table that tilts, plus wide armrests or leg bolsters for supported positioning?
- Can we schedule the earliest slot of the day for a quiet room and freshly disinfected surfaces with fragrance-free options?
- Is there space for a wheelchair to stay in position, and are transfer boards or staff assistance available if I prefer the table?
- May I bring a caregiver or support person, and can we plan 10-minute movement breaks every 30–45 minutes?
Share your body specifics during consultation, not just the design
Your body map matters as much as your art references. Tell your artist about range of motion limits, spasticity, tremors, neuropathy, pressure injury risk, POTS or dysautonomia, and any seizure protocol well before the appointment. Request a slightly longer consult slot so you can test positions and decide on session length. Use a written brief if speech is fatiguing or you prefer AAC. If adhesives ever cause a rash, ask for an adhesive patch test with Saniderm or Recovery Derm Shield 48 hours before the tattoo. If your condition flares with vibration, propose shorter linework bursts and more shading on a separate day. For a structured planning worksheet, see our consultation checklist for special needs.
- Name triggers early, such as heat, cold, bright light, vibration, or firm touch, and what calms you fastest.
- Set a maximum pain score, for example 6/10 max, and a signal to pause instantly if you hit it.
- Confirm medications and timing, particularly blood thinners, muscle relaxants, or stimulants, with your clinician in advance.
- Agree on a session cap, for example 2.5 hours with scheduled breaks and a buffer to dress and transfer out safely.
- Request scent-free or low-fragrance soaps and disinfectants if contact dermatitis is a concern.
Positioning strategies and supports that work
Position is everything for comfort and line quality. The rule is simple, stabilize what shakes, pad what compresses, and elevate what swells. Many clients do best staying in their wheelchair for forearm or calf work, using the chair’s lap tray as a stable rest. Others need a semi-reclined setup with knees supported to offload the lower back. Build your kit like you would for a long travel day, then add a tattoo-specific arm or leg support. If you have pressure injury history, follow a pressure relief schedule at least every 30 minutes and use thicker padding at all bony points.
- Support gear that helps: memory foam wedges, a lumbar roll, a U-shaped travel pillow, a pregnancy wedge, and a foldable Therm-a-Rest Z-Seat (non-sponsored examples).
- Small tools, big difference: Velcro straps to secure an arm to a rest, non-slip shelf liner under pads, hot-cold packs for comfort cycles.
- Creative rests: a Boppy pillow under the wrist for linework, a rolling cart topped with foam as a height-adjustable leg stand.
- For leg tattoos with spasticity, strap the ankle lightly and pad both sides of the calf to reduce involuntary rotation.
- For back or rib pieces, a semi-prone tilt with pads at shoulder and hip reduces chest compression and helps breathing.
Pain planning, meds, and numbing creams used safely
Start with the basics that work for almost everyone. Sleep well, eat complex carbs and protein 60 to 90 minutes before, hydrate, and skip alcohol for 24 hours. If you use prescription anticoagulants or have conditions that affect healing, coordinate timing with your clinician. For topical numbing, stick to reputable lidocaine 4–5% creams used exactly as labeled. Popular options include TKTX, Dr. Numb, and Aspercreme Lidocaine 4% (non-sponsored examples). Avoid heavy occlusion if you overheat easily or have autonomic issues, and always tell your artist what product you applied. For safety guidance on over-the-counter topicals and ink ingredients, consult the U.S. Food and Drug Administration. For wound healing considerations in chronic conditions like diabetes, the Mayo Clinic provides accessible overviews.
- Test numbing cream on a small skin patch 48 hours before the appointment to check for irritation or allergy.
- Apply a thin layer, wait the labeled time, remove residue completely, then cleanse once more at the studio before stencil.
- If pain climbs above your agreed 6/10, pause, reposition, or split the session, quality beats endurance every time.
- Bring a cooling towel and electrolyte drink if you’re prone to lightheadedness, and take short movement breaks.
- If you have neuropathy, rate pain by function, for example hand strength or spasm frequency, not just sensation alone.
Skin prep and aftercare tailored for limited mobility
Sensitive or barrier-compromised skin needs gentler prep and a plan for hands-free care. If shaving is difficult, ask the artist to clip hair with a guarded trimmer first to reduce microabrasions. After the tattoo, choose dressings and balms you can manage without contortions. For easy first-week care, Saniderm, SecondSkin, or Recovery Derm Shield create a sealed barrier you change every 24–72 hours depending on plasma output (non-sponsored examples). When you switch to moisturizer, use a thin layer twice daily. Solid picks include Bepanthen, Aquaphor, Hustle Butter Deluxe, or Mad Rabbit Repair paired with gentle, unscented soaps (non-sponsored examples). For adapting routines by skin type or chronic pain flare windows, see our aftercare templates and aftercare for chronic pain. For medical background on tattoo reactions and contact dermatitis, the American Academy of Dermatology is a solid reference.
- If you use braces or splints, pad straps so they do not rub the fresh tattoo, and add a breathable gauze wrap during the day.
- Keep mobility aids clean, wipe high-contact areas with mild soap to avoid transferring bacteria to healing skin.
- If adhesives irritate your skin, switch to hypoallergenic tape or a silicone-based dressing and shorten wear time.
- Set alarms for morning and evening wash-moisturize cycles to prevent missed care on low-energy days.
- Watch for signs of reaction or infection, including spreading redness, warmth, swelling, or fever, and contact your clinician promptly.
Managing time, fatigue, and dysautonomia during the session
Pacing is the quiet superpower. Most clients with fatigue or autonomic swings do better in 2–3 hour blocks with built-in mini breaks. Schedule mornings if that is your best window, ask the artist to pre-sterilize supports, and keep the room temperature on the cool side. Small snacks stabilize energy, and compression garments can help some people maintain blood pressure if already part of your routine. If you trend toward fainting with needles, ask for a semi-reclined position, a fan, and a cold compress ready for the first five minutes.
- Break rhythm that works: 20–25 minutes of work, 5–10 minutes off, then reassess pain and position each cycle.
- Fuel plan: bring salted nuts, cheese sticks, sports drink, or glucose tabs if you have reactive lows.
- Keep a checklist card with meds, emergency contacts, and your preferred response if you feel faint or have a seizure.
- Use a cooling towel around the neck and a small USB fan to reduce sweat that can loosen stencils.
- Have a backup plan to end early if symptoms spike, rescheduling the remainder protects both your body and the artwork.
Communication signals, consent, and sensory planning
Good tattoos run on consent and clarity. Agree on a simple stop signal, like a raised fist, plus a pause and slower cue. Ask the artist to say when they start a line, when they shade, and when they wipe, so your body is never surprised. If noise or bright light spikes your symptoms, bring noise-canceling headphones such as the Sony WH-1000XM5, a sleep mask, and a neutral playlist with 60–80 BPM tracks. Some clients focus better if the artist counts down the last five seconds of a pass. Pain education resources from the Cleveland Clinic can help you plan coping strategies that are grounded and safe.
- Signals to set: stop, pause, slower, reposition, and a thumbs up to resume so no one guesses your status.
- Ask for verbal landmarks, for example “lining,” “wiping,” “shading,” and “nearing a tender edge” to anticipate sensations.
- Request unscented wipes and distilled water rinse if fragrance triggers headaches or dermatitis.
- If you hyperfocus then crash, set a timer so breaks happen even when you feel okay in the moment.
- Place your phone in reach with accessibility features on, such as voice control or large-type pain tracking.
Budgeting for access needs and travel
Transparent planning prevents money stress mid-session. Factor in the art rate, travel, and any add-ons like extra padding or dressings you want to leave with. Most artists are happy to price in a longer slot so you are not rushed through transfers and cleaning. Expect typical big-city rates around $150–250 per hour, shop minimums of $100–150, and an aftercare bundle between $10–40 depending on products. If you need a caregiver present, check seating rules. Budget for an accessible rideshare or parking that keeps transfers short, which preserves your energy for the tattoo, not the commute.
- Line items: hourly rate, deposit, shop minimum, travel, caregiver parking, and a buffer of 10–20% for unexpected time.
- Bring your own supports to avoid last-minute purchases, for example wedges, wraps, or a portable cushion.
- Ask for an itemized invoice including any take-home supplies like Saniderm, gauze, or medical tape.
- Tip for the service you receive, which includes careful setup and repositioning time in addition to the artwork.
- If budget is tight, split the piece into two to four sittings, which often improves comfort and heals cleaner.
When to reschedule, safety red flags
Some days are not tattoo days, and that is responsible. Reschedule if you have a fever, active skin infection, open pressure injury near the placement, uncontrolled spasms, or a major medication change. Latex or adhesive allergies are manageable with alternatives, but an acute rash should heal first. For medical background on tattoo reactions and infection warning signs, the American Academy of Dermatology is a go-to reference. For healing risks in chronic conditions or immunosuppression, the Mayo Clinic and the U.S. Food and Drug Administration offer reliable guidance.
- Active illness, fever, or a new antibiotic course, wait until you are fully recovered and cleared by your clinician.
- Open wounds, pressure sores, or rashes in or near the placement, let skin return to baseline to protect the tattoo.
- Uncontrolled spasticity or seizures that day, rebook so you can hold still enough for clean lines and safe positioning.
- Recent sunburn at the site, peeling or inflamed skin does not hold ink well and increases complication risk.
- New medication that affects bleeding or immunity, confirm timing with your prescriber before proceeding.
Ready to shape a session around your body, not the other way around? Use AI for Tattoo to pre-visualize placement and scale on your own photos, then share that plan with your artist. Generate concepts in minutes in the editor and preview them on your body with our virtual try-on. If you want style inspiration before you book, browse live examples in our library.
Try AI for Tattoo Free